IIS Crypto is a free tool that gives administrators the ability to enable or disable protocols, ciphers, hashes and key exchange algorithms on Windows Server versions 2012 through 2025. It also lets you reorder SSL/TLS cipher suites offered by IIS, change advanced settings, implement Best Practices with a single click, create custom templates and test your website.
Features
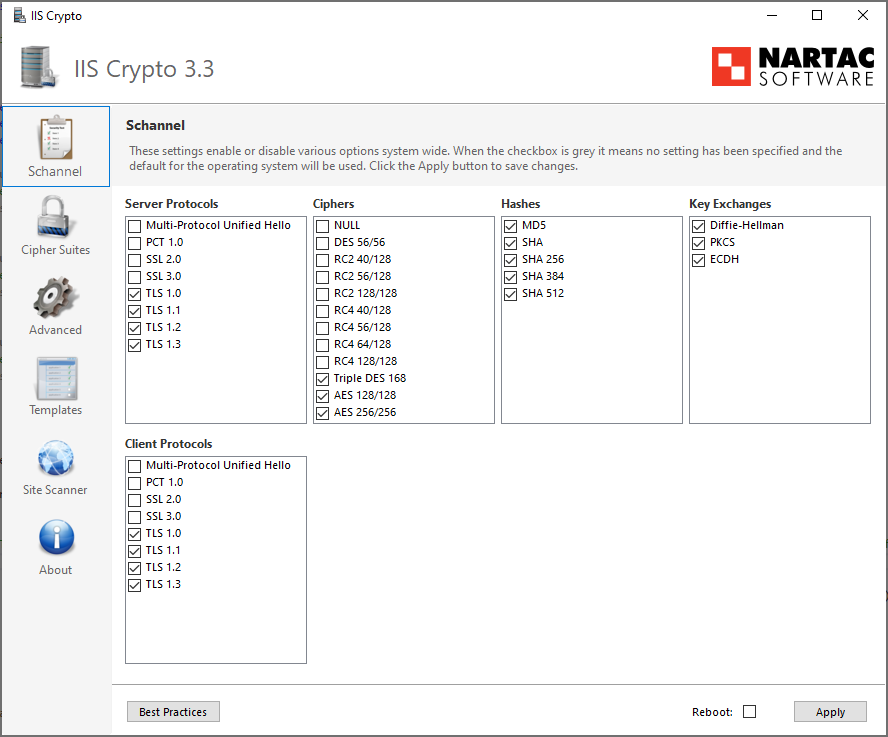
What Does IIS Crypto Do?
IIS Crypto updates the registry using the same settings from this article by Microsoft. It also updates the cipher suite order in the same way that the Group Policy Editor (gpedit.msc) does. Additionally, IIS Crypto lets you create custom templates that can be saved for use on multiple servers. The command line version contains the same built-in templates as the GUI version and can also be used with your own custom templates. IIS Crypto has been tested on Windows Server 2012 R2, 2016, 2019, 2022 and 2025.
IIS Crypto requires administrator privileges. If you are running under a non-administrator account, the GUI version will prompt for elevated permissions. The command line version must be run from a command line that already has elevated permissions.
Downloads
IIS Crypto is offered in both a GUI and a command line version. Click here to choose your version and download.
Custom Templates
IIS Crypto allows you to create your own custom templates which can be saved and then executed on multiple servers. To create your own template, select all of the settings for your configuration. Click on the Templates button and give your template a name, author and description if desired. Then click on the Save button to save your template to disk. Copy your template to another server, run IIS Crypto and click on the Open button to load your template. You can also use it from the command line version of IIS Crypto.
Load the Best Practices template before you start customizing your own template to ensure your template is setup securely. If your template is in the same folder as IIS Crypto it will show up automatically in the drop-down box without having to click the Open button first.
Command Line Help
The following are the switches for the command line version of IIS Crypto. All parameters are optional.
| Switch | Option | Description |
|---|---|---|
| /backup | <filename> | Specify a file to backup the current registry settings too. |
| /log | <filename> | Specify a file to log too. |
| /reboot | Reboot the server after a template is applied. | |
| /template | default | This template restores the server to the default settings. |
| best | This template sets your server to use the best practices for TLS. It aims to be compatible with as many browsers as possible while disabling weak protocols including TLS 1.0 and 1.1. It also disables non forward secrecy and SHA1 cipher suites except on Windows Server 2012. | |
| pci40 | This template is used to make your server PCI 4.0 compliant. It is similar to Best Practices but removes some older cipher suites on Windows Server 2012. | |
| strict | This template sets your server to use the strictest settings possible. It is similar to PCI 4.0 but removes CBC cipher suites for all versions of Windows Server 2016 and later. | |
| fips140 | This template makes your server FIPS 140-2 compliant. It is similar to the Best Practices template, however, it is not as secure as Best Practices because some of the weaker cipher suites are enabled. | |
| <filename> | Specify the filename of a template to use. | |
| /verbose | Display/write all log events. | |
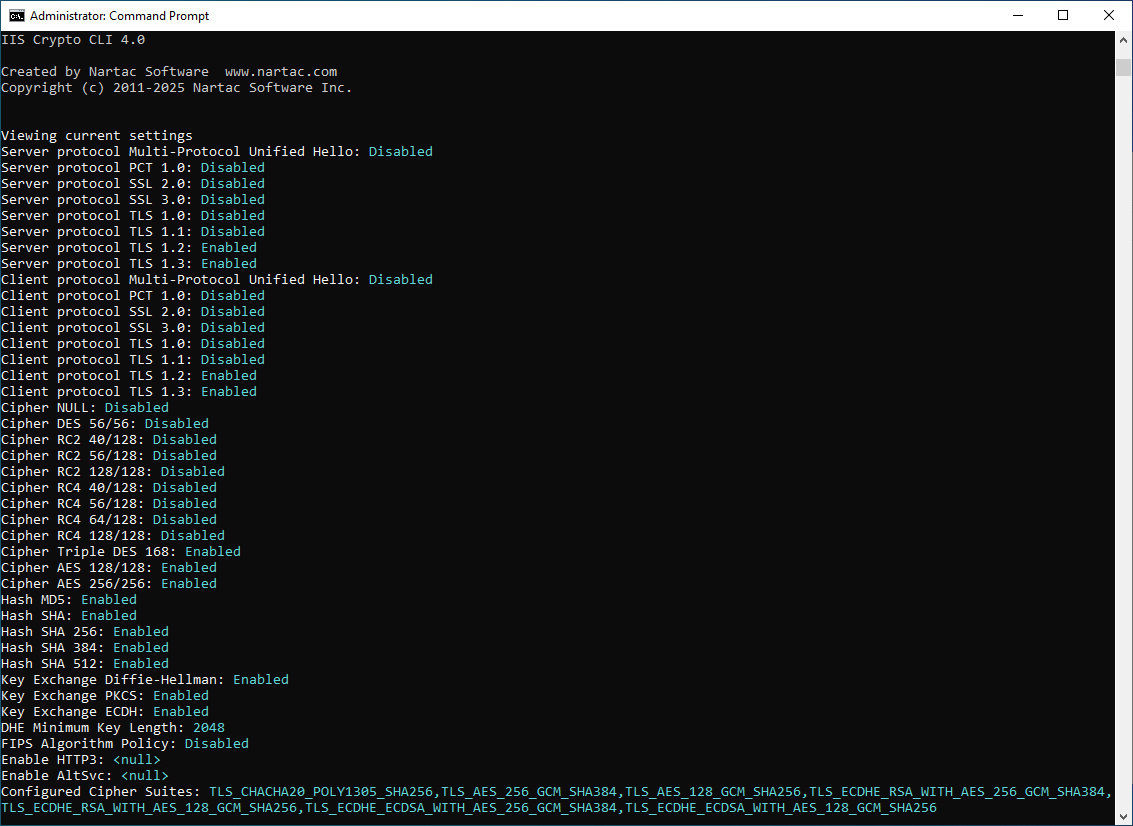
| /view | Shows all current settings. | |
| /help|? | Show the help screen. |
Here is an example that backs up the registry to a file named backup.reg, applies a custom template named MyServers.ictpl and reboots the server:
iiscryptocli /backup backup.reg /template "C:\temp\MyServers.ictpl" /reboot
Here is an example that shows all current settings and logs them to a file:
iiscryptocli /log settings.log /view
Support
Please take a look at our FAQ. If you have any other questions, feel free to contact us.
Test Your Site
To test your site after you have applied your changes, click the Site Scanner button, enter in the URL and click the Scan button. You can also scan online from here:
Additional Information
Here are some additional resources you may find useful: